How to control music visuals with a MIDI controller
Visuals that follow the music by themselves are great until the moment you want to push them: a build that deserves more glow, a drop where the screen should freeze for a beat. A MIDI controller gives you those hands-on moments. In AVIZ any knob on screen can be taught to follow a knob on your desk, and pads can switch scenes. Any class-compliant USB controller works.

What you need
- A MIDI controller with knobs, faders or pads. A small one with eight knobs and eight pads covers a whole set. DJ controllers send MIDI too.
- Chrome or Edge on Mac or Windows, or AVIZ for Mac. These have Web MIDI; other browsers show a note instead of the controls.
Step 1: turn MIDI on
- Plug in the controller.
- In AVIZ, click an empty spot on the node map to open Global settings and scroll to MIDI.
- Press Turn on MIDI controller. The browser asks for permission once; allow it. The section then shows Connected: and the name of your device.
If the browser blocked access, allow MIDI in the site settings (the icon left of the address) and press the button again.
Step 2: teach a knob
- Select an effect on the map.
- Right-click the parameter you want to control and choose Learn MIDI….
- Turn a knob or move a fader on the controller. That’s it: the parameter now follows it.
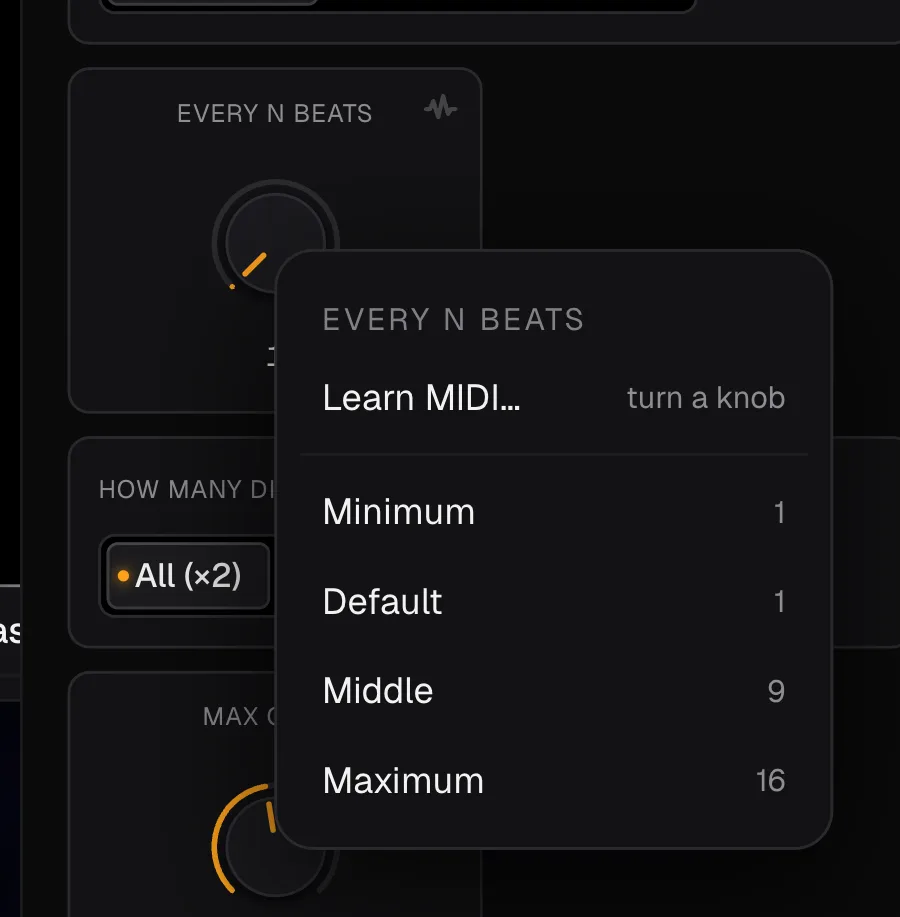
The controller covers the parameter’s full range, from its minimum at 0 to its maximum at 127. On/off switches work too: a pad flips them, a knob turns them on past halfway. To move a mapping, choose MIDI: another knob… in the same menu; to remove it, Unmap MIDI. The MIDI section also has Unmap MIDI from the whole scene when you want to start over.
Mappings are saved in the scene itself, so they travel with the project and come back when you open it on another computer.
Step 3: give the pads actions
Pads and buttons can run app actions. In the MIDI section, press Learn next to an action and hit a pad:
- Next scene: load the project’s next saved scene.
- Shuffle all nodes: random values across the scene, for a sudden change of look.
- Pause / play music.
- Freeze the visual at this moment: the effects keep living on the sound of that one instant until you hit the pad again.
- Present full screen.
Action mappings belong to the device rather than the scene: they stay the same whichever project you open, the way a DJ’s cue buttons do.
A layout that works
- Knobs 1–4: the parameters that matter most in each scene, such as glow intensity, speed, colour shift and the size of the main shape.
- Fader: the opacity of a layer, to bring a second effect in and out by hand.
- Pads: next scene, freeze, shuffle and full screen.
Leave the rest to the music. Links to bass, kicks and drops (how they work) keep the scene moving, and your hands only step in at the moments that matter. On a projector at a gig (setup guide), keep the laptop out of the way and play from the controller.
What it doesn’t do
AVIZ reads Control Change messages and notes. It doesn’t use SysEx, doesn’t send light feedback back to the controller, and has no OSC input, so show-control software can’t drive it. For that kind of setup, run AVIZ as a layer into Resolume or another VJ program over Syphon or NDI® and map the controller there.
Try it on Rings & kaleidoscope: map the ring’s size to a knob and the kaleidoscope to a fader, and play.