How to make a music visualizer video from your track
A music visualizer is a picture that moves with the song: shapes that jump on the kick, colour that floods in on the drop. Here is how to make one in AVIZ for YouTube, Reels, TikTok or Shorts, with the sizes and export settings each of them expects.

What you need
- The track as a file: MP3, WAV, FLAC, M4A/AAC or OGG/Opus, up to 100 MB.
- Chrome or Edge on a laptop or desktop, or AVIZ for Mac (Apple silicon).
- About fifteen minutes for the first video.
Use music you have the rights to: your own releases, a client’s track, a licensed beat. Spotify, Apple Music and YouTube don’t allow their audio to be recorded into a video, so AVIZ only listens to them live and never saves that sound.
1. Open AVIZ and load the track
Go to app.aviz.studio, press Tracks or drag the audio file into the window. The waveform appears under the node map, marked with the bass, the kicks and the quiet parts. AVIZ analyses the file on your computer; the track isn’t uploaded anywhere.
2. Start from a template
Open Templates and pick a scene close to the mood of the song. Cells on the beat, for example, splits glowing cells on every kick, merges them at sixteen and starts again on the drop. A template is an ordinary scene: every node in it can be changed, deleted or rewired.
Or press Fit to track: AVIZ reads the tempo and character of the song and offers 16 scenes made for it. Click one to switch to it; if none fits, ask for 16 more.
To build from scratch, double-click the node map, search for an effect and connect its output to Output. There are 114 effects and 31 transitions, from spectrum bars and particle fields to film grain, halftone and glitch. Your own images, video, GIFs and 3D models (glTF/GLB, OBJ, STL) become layers too.

3. Tie the picture to the music
Every effect already listens to the bass, mids, highs and drops. To make the whole scene follow the song in one go, press Link whole scene to music in the settings panel. For finer control, drag the green output of an Audio or LFO modulator onto any knob and choose which parameter it drives: the zoom follows the bass, the hue jumps on the kick, the glitch opens up on the drop.
If the scene reacts too often or too rarely, adjust two values: Kick threshold (lower catches more kicks) and Drop threshold (a drop is a very strong kick that switches shapes and scenes).
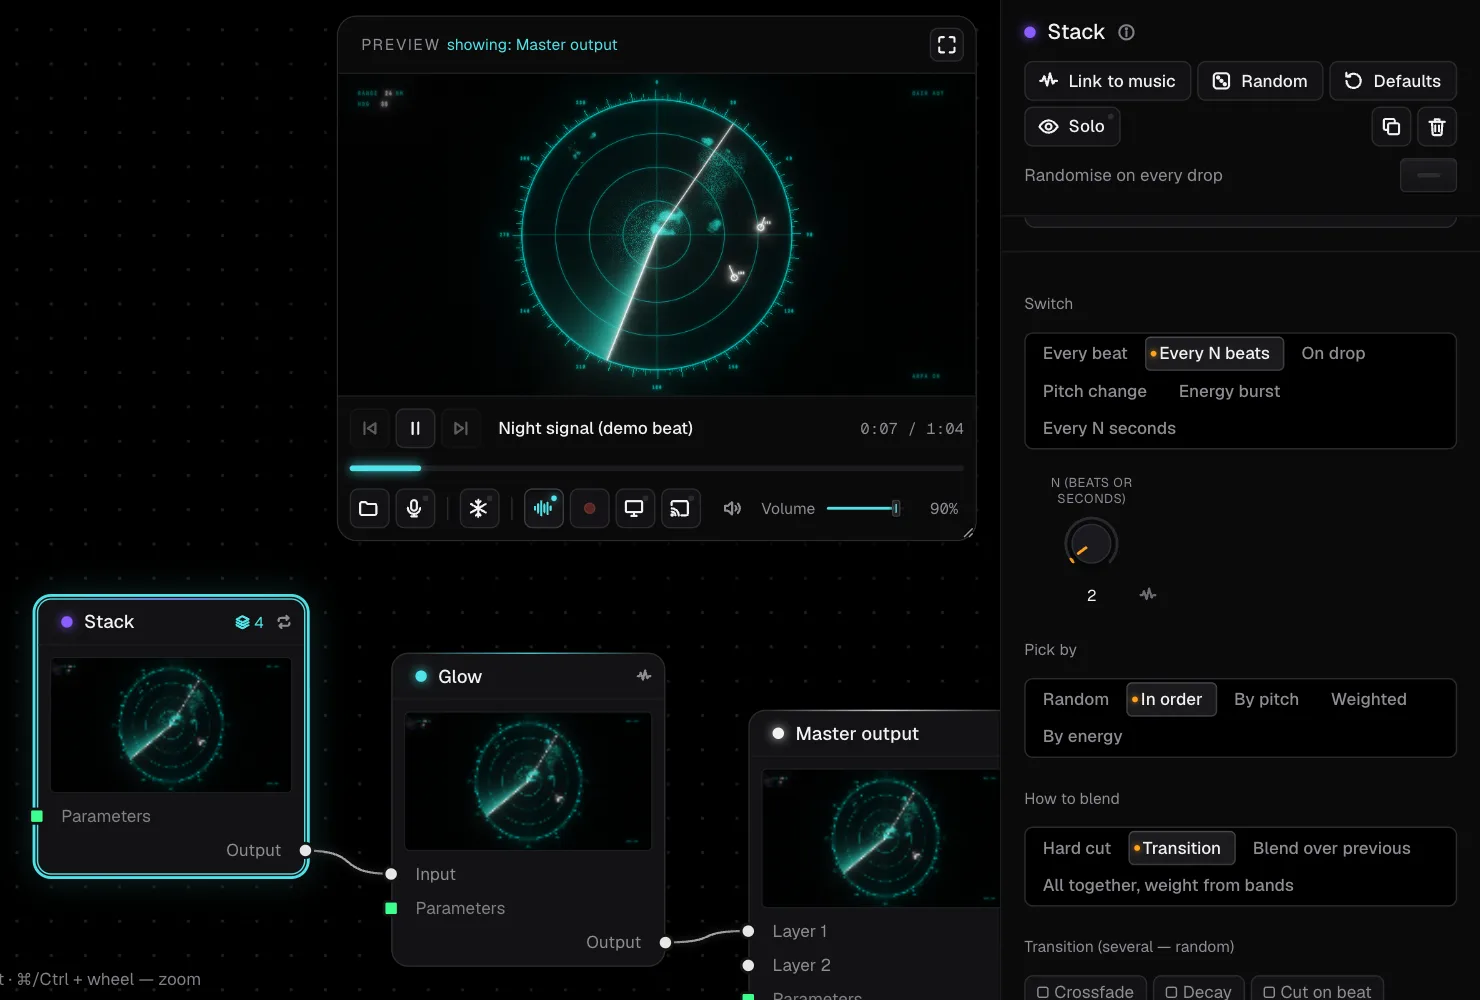
For a longer video, put several effects into one Stack. It switches between up to eight of them on kicks, drops or rising energy, with a transition each time, and the transition lands on the downbeat instead of halfway through a bar.
4. Export the video
Open File → Export video and frames…. Choose Video, set the start in seconds and the length, and keep Track audio in video on. Export renders every frame in full and analyses the sound from the file in step with the frames, so the hits line up with the music even on a slow laptop. It takes longer than real time.
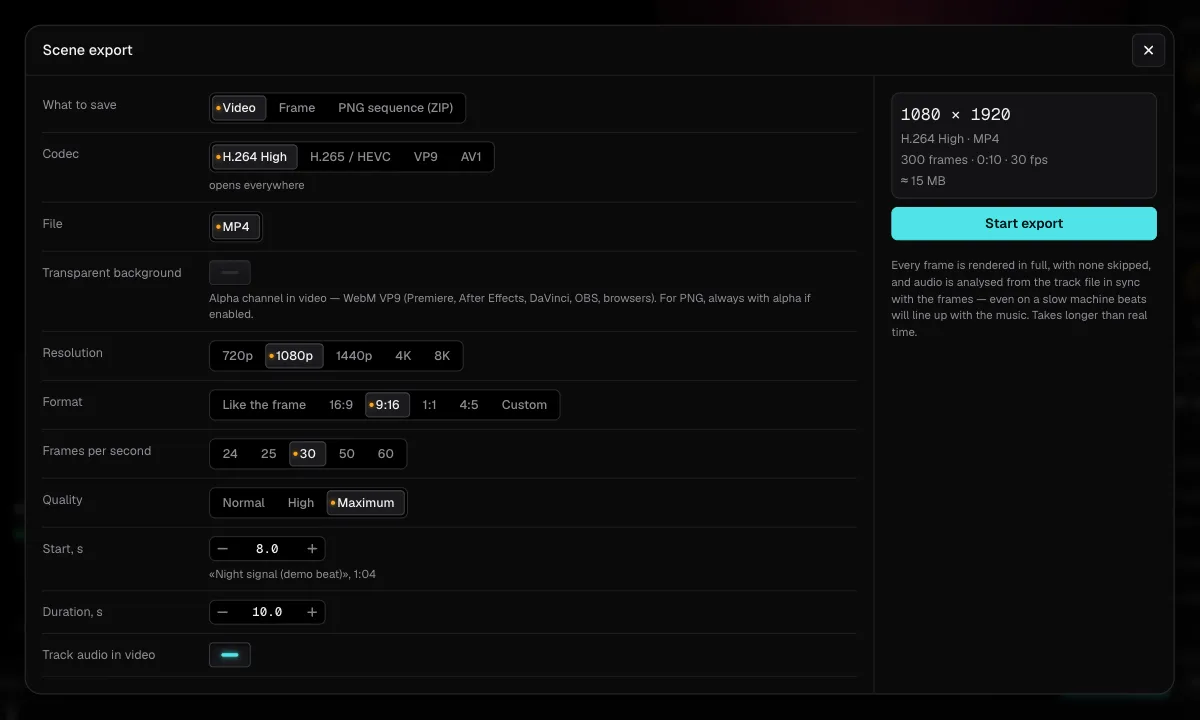
Settings that work for each platform:
| Where | Format | Resolution | fps · codec |
|---|---|---|---|
| YouTube video | 16:9 | 1080p or 4K | 30 or 60 · H.264 MP4 |
| Reels, TikTok, Shorts | 9:16 | 1080p (1080×1920) | 30 · H.264 MP4 |
| Instagram feed | 4:5 or 1:1 | 1080p | 30 · H.264 MP4 |
| Spotify Canvas | 9:16, no sound | see the Canvas guide | 30 · H.264 MP4 |
| Overlay in an editor | any | any | VP9 WebM, transparent background |
H.264 opens everywhere. H.265 gives a smaller file for Apple devices; AV1 gives the smallest file but encodes slowly. If you plan to lay the visuals over footage in Premiere, After Effects or DaVinci Resolve, turn on the transparent background: it exports as VP9 in WebM with an alpha channel. A still frame (PNG, 16-bit PNG, JPEG, WebP) or a PNG sequence in a ZIP is in the same dialog.
For a vertical clip, export only the strongest 10–20 seconds, usually the drop or the hook, and keep text and faces out of the bottom and right edges, where Reels and TikTok put their buttons and captions.
Recording live instead of exporting
When the sound comes from a microphone, another tab or your Mac’s system audio, AVIZ can’t analyse it ahead of time, so the export dialog would render without music. Use Record in the player: it captures the preview with sound in real time, as it looks on screen, at 720p, 1080p, vertical 1080×1920 or square, 30 or 60 fps, in MP4 or WebM.
Free or Pro
Every effect, template and transition is in every plan. Free exports up to 720p with a small AVIZ watermark and is for personal use. Pro ($12 a month or $96 a year) exports up to 4K with no watermark, allows commercial use (client work, ads, releases) and adds 10 GB of cloud storage. There is also a one-time founder licence: Pro for life for $128, for the first 32 buyers. Plans and prices are on the main page.